A Beginners Guide To Setting Up Goals In Google Analytics
Goals on Google Analytics help you determine if your website is converting users into customers, and where that’s happening the most and the least. Or converting users into newsletter subscribers and the like, depending on what your main objective is with your company or organization. Basically, it’s something you really want to utilize when we’re talking about Google Analytics.
Once you have everything set up for your goals on Google Analytics, you’ll be able to see your conversion data with goal completions and goal conversion rate. But, you must configure it correctly because otherwise you’ll track the information incorrectly or not at all. You could even end up tracking data that doesn’t matter or isn’t your real goal. And, configuring your goals as soon as possible to get all of the data you need is crucial, because Google cannot go back in time to capture the data it missed while you weren’t using the goals feature. While you can track up to 20 goals, it’s best to go straight for your top level goals instead of less significant events. These goals could be a user giving their contact information, subscribing to your newsletter, making a purchase, scheduling appointment, or other depending on your product or service. There are five types of goals that you can set up.
Destination Goal
A Destination Goal is when someone hits a certain page.
Duration
A Duration Goal will be achieved when someone views your website for a certain amount of time. If it only matters to you if someone is on your site for 10 minutes, Google will let you know how often it happens.
Pages per Session
The bell for a Pages per Session goal will be rung when a user has hit a certain number of pages during their session. If you want to track how many users are going to 2 pages during their session, they’ll be captured here.
Event
This is different from a Destination Goal in that you’ve embedded into your code that this certain goal is an event. It could be a user hitting a link to your social media page.
Smart Goal
This is a more complex goal, and you can only use it if you have Google Ads and at least 500 clicks from said ads. The smart part comes from the use of machine learning to determine whether or not there has been a conversion from your engaged users.
Example of Destination Goal
Because a destination goal is simple and common, we’ll dive into it as an example of how to create a goal.
Let’s say you want someone to put in their contact info for you to reach out to them, like we have on our contact page. So, how do they get from a to z?
Before we do anything, go through your site and write down the URLs for each page you land on before getting to the reach out page and ultimately the thank you for giving your information page. This last page is what you’ll want google to record, but of course getting there is important too and will come into play later.
How to Input a Destination Goal
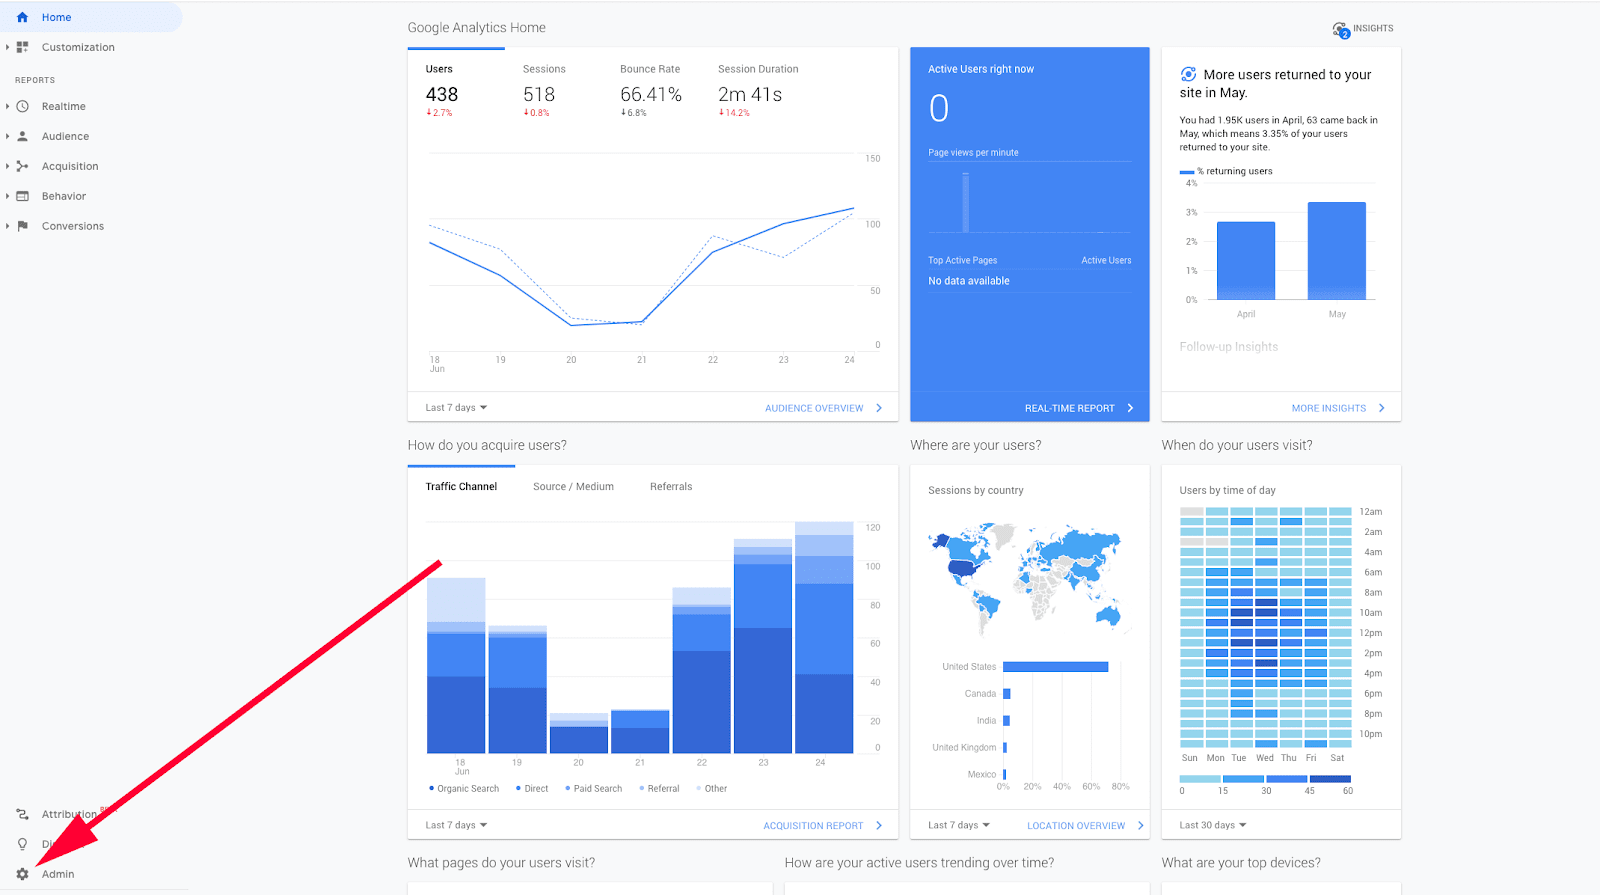
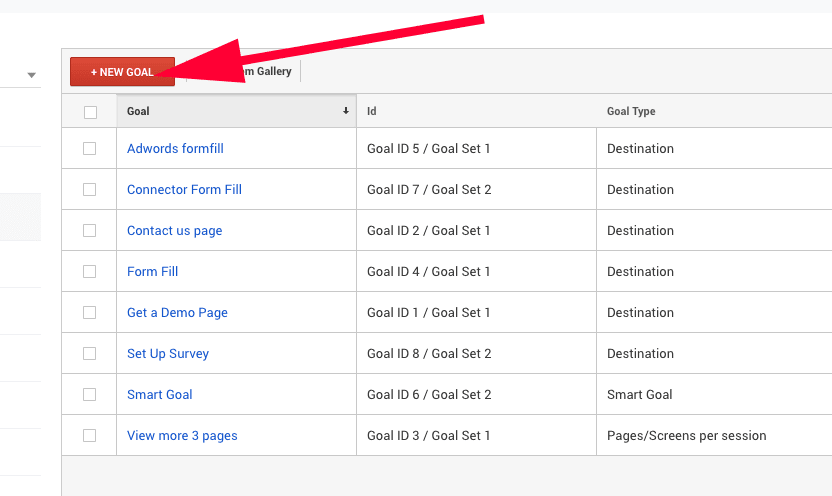
First, ensure you’ve got the right permissions via the “Admin” page, and then once you go to the reporting view for the goal you’re thinking of, you’ll see “Goals” and then “Add New Goal.”

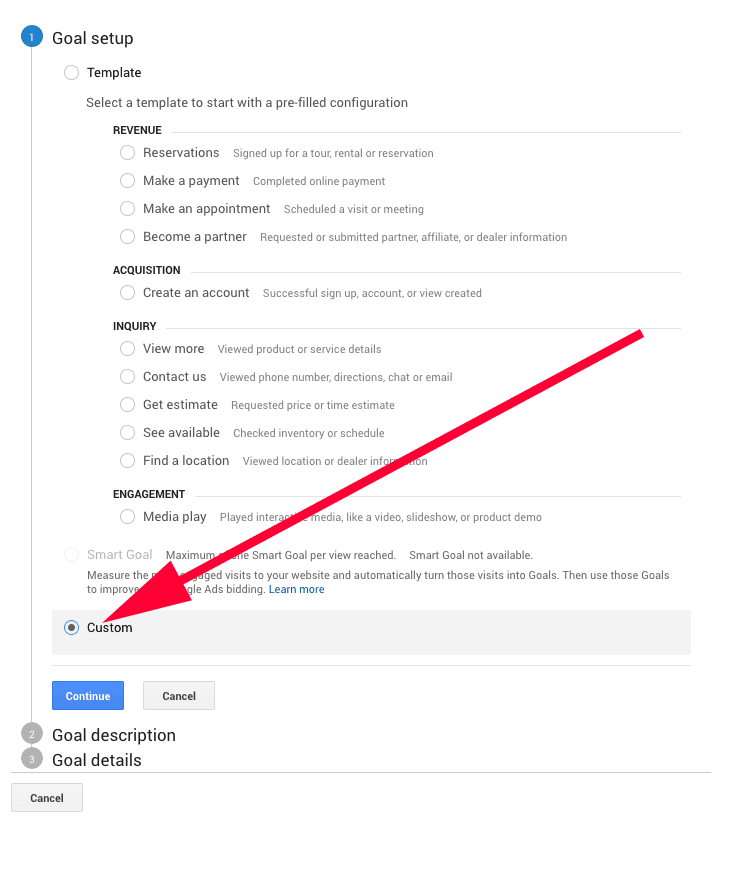
From there, there’ll be goal templates that you can use if you’d like, but we think it’s better to start one from scratch and click “Custom”.
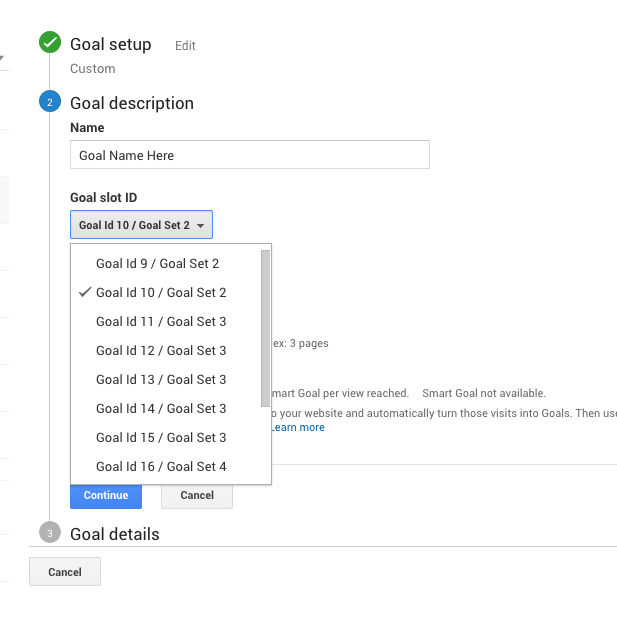
Remember to name your goal something quick and clear.
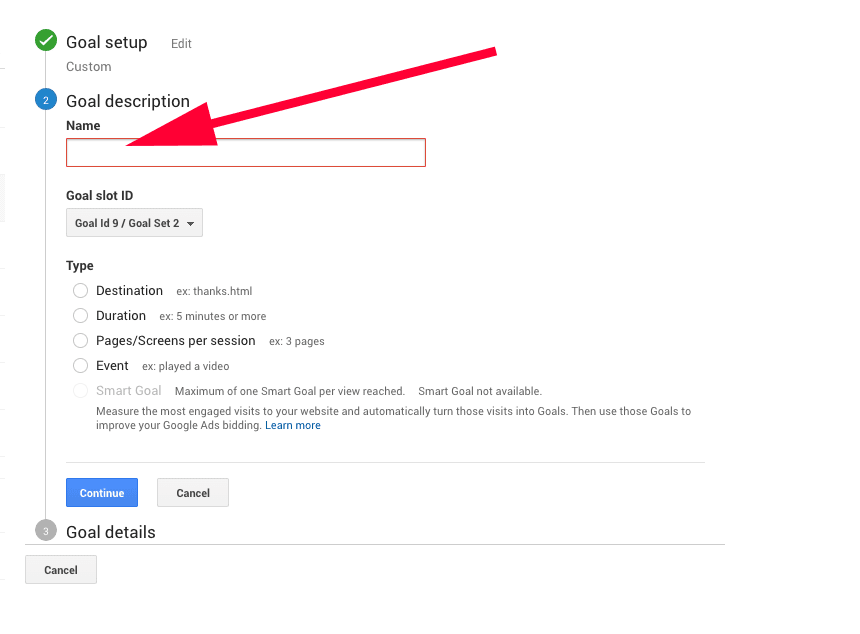
For “Group Slot ID” you can choose one so that goals are grouped together, or you can leave the default setting.
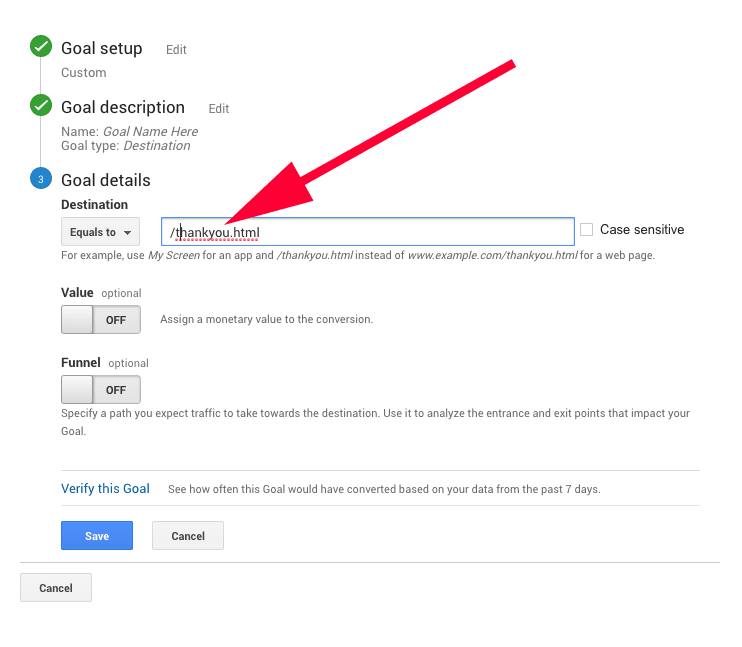
Finally, click the type of goal – say the “Destination Goal” and hit continue. This is where you add in that URL you landed on earlier. Again, while the journey is important, we’re likely more interested in the arrival. Don’t put the contact page as the goal, because then you won’t know if someone actually gave the information, just that they landed on the page. Make sure it’s the thank you or confirmation page, because then that’s a clear conversion.
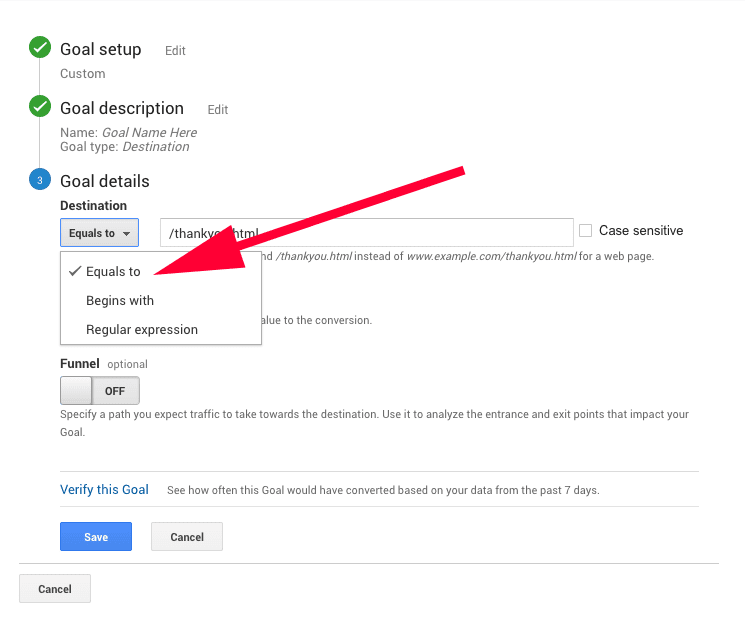
You’ll see it says “Equal To”. The other options are “Begins With” and “Regular Expression”. These mean what Google will record URL wise as the destination. If you only want Google to track if someone lands on your /thank-you page, use “Equal to”. For “Begins With,” if there’s other URLs that give you the same expression of conversion, like /thank-you/contact or /thank-you/news/, it’ll count those as well, as long as the first part is the same. If you choose “Regular Expressions” the link will be counted based on regular expressions.
While it isn’t necessary, adding a monetary value to your goal could add a lot of value to what you’re tracking. That is, if you know around how much money a lead from this page could bring to your company.
Now, that little trip you took can come in handy when we move onto Funnels, which is an option for us since we selected “Destination Goal”. You need to add pages here that are directly related to your destination goal page, so maybe not the homepage, but definitely that contact page where one enters their information. Again, name this step something clear and quick. You’ll be able to benefit from this in the Goal Flow and Funnel Visualization reports that Google offers. But, if you don’t do this step, you’ll still be able to see the destination goal conversion without it. You don’t have to make this step required.
Click “Verify this Goal”! Just check that the conversion rate seems accurate for the last week to ensure that you’ve set up the goal correctly. If it seems off or is saying 0, you should go in and double check your configuration.
Lastly, click “Save” and you’ve done it! You’ve set up a destination goal in Google Analytics!
Still having trouble? We can do it for you! Don’t hesitate to reach out to us at Firon Marketing with questions, or even a free marketing audit.